
Paper flowers have become a popular choice for those looking to add lasting, creative decoration to their homes. With just a few simple materials and easy-to-follow instructions, anyone can craft beautiful paper flower arrangements that brighten living rooms, bedrooms, or party spaces.
Learning how to make paper roses, giant peonies, or simple floral accents allows for endless customization with color and style. Whether using crepe paper, craft paper, or even sticky notes, handmade paper flowers offer a unique way to personalize home decor.
Tutorials, like those found in DIY paper flower guides and realistic paper rose instructions, ensure anyone can achieve beautiful results, regardless of crafting experience.
Paper flower decorations offer not only a creative hobby but also a practical way to add character and charm to any space. Families, students, and creative enthusiasts will find that learning these techniques brings both personal satisfaction and a touch of artistry into everyday life.
Essential Materials for Paper Flower Crafting
Selecting the right materials ensures beautiful, sturdy, and realistic paper flowers. Paying attention to details such as paper thickness, adhesive strength, and decorative accents can make a significant difference in the final result.
Choosing the Right Paper
Paper selection shapes both the appearance and durability of a paper flower. Crepe paper is highly valued for its flexibility and textured surface, allowing petals to be shaped with ease.
It comes in various weights; heavier crepe holds shapes well, while lightweight varieties provide delicate, fluttery effects. Tissue paper is ideal for soft, fluffy flowers like peonies or carnations.
Its translucency adds a subtle, airy feel but it tears easily, so gentle handling is required. Cardstock and cardstock paper work well for bold flowers with clean, defined edges—such as lilies or daisies—as the sturdy texture maintains crisp folds and cut shapes.
When considering different types of paper for crafting, mix and match based on flower type and desired effect. Always check paper colorfastness, especially when using glue, as some dyes may bleed.
Selecting Scissors and Cutting Tools
Precise cuts are essential for intricate petal and leaf shapes. Sharp, fine-tipped scissors allow for precise trimming and minimize fraying across crepe or tissue paper.
Craft knives and rotary cutters help create uniform patterns and are especially helpful when cutting multiple layers at once. Dedicated paper crafting scissors tend to be more comfortable for extended use and better at producing clean edges in heavier cardstock.
For those making large quantities of flowers, investing in a small cutting mat and a rotary blade can speed up the process and ensure accuracy when replicating shapes. The right cutting tools for paper flower crafting directly impact the texture and shape of each element.
Keep all blades sharp to prevent tearing and ensure each petal looks clean and polished.
Understanding Glue Options
Choosing the ideal adhesive depends on both the paper type and the scale of your flower. A glue gun with low-temperature settings is a staple for quick, strong bonds, particularly when attaching petals made from cardstock or crepe paper.
However, it may warp delicate tissue paper if applied too heavily. Tacky glue and PVA glue offer secure yet flexible bonds for crepe and tissue paper.
These liquid glues dry clear and work well for small, delicate details. Stick glue is best reserved for lightweight tasks, like reinforcing tissue layers, but lacks strength for structural assembly.
Test glues on paper scraps before final use to avoid damaging your main materials. If assembling stems, consider floral tape—its slight tack helps bind layers and secure flowers to wire stems without visible glue marks.
Accessories and Embellishments
Enhancing paper flowers with thoughtful accessories brings a professional touch. Floral tape wraps neatly around stems and wires, providing a more finished look and better stability.
Wire supports petal shaping and maintains flower structure, especially for tall or standing arrangements. Decorative centers such as faux stamens, pearls, or beads add realism and texture, especially in roses or lilies.
Ribbon, glitter, and sequins can offer visual interest, but use them sparingly to avoid overwhelming the flower’s form. Display elements, like paper leaves or custom bases, complete the presentation.
Matching these accessories to the flower’s color palette and style elevates any paper flower arrangement for home decor or special events.
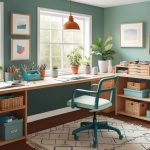
Preparing Your Workspace for Paper Flower Projects
Setting up an effective workspace ensures that making paper flowers remains easy, efficient, and enjoyable. An organized area with good lighting and safe practices helps streamline the process, allowing for precise and creative results.
Organizing Materials
Keeping supplies within reach is essential for any paper flower project. Tools often include scissors, craft knives, glue sticks, floral wire, and a cutting mat.
Arrange colored paper and cardstock in separate trays or folders to avoid confusion and reduce clutter. Use clear containers, labeled drawers, or a small storage cart for items like adhesives, tape, and embellishments.
Maintain a checklist of necessary tools and restock materials before starting. This reduces interruptions and helps streamline each project.
Laying out the workspace with a large, flat work surface allows space for cutting, folding, and assembling. Consider placing a trash bin or paper recycling box nearby to quickly discard scraps.
Using a dedicated area for these crafts minimizes mess and protects furniture.
Safety Tips
Paper flower crafting involves sharp tools and adhesives that can cause injuries if not handled carefully. Always cut paper away from the body when using scissors or a craft knife.
Store blades and sharp objects out of reach of children and pets. Choose non-toxic, washable glues to prevent unwanted stains and allergic reactions.
Keep a damp cloth ready for quick clean-up of spills. Avoid inhaling fine paper dust that can accumulate from cutting multiple sheets; wipe surfaces regularly.
Wear protective eyewear if using tools that may splinter or send small particles flying. Properly dispose of or secure all sharp leftovers, such as wire trimmings, once your project is completed.
Good safety habits keep crafting enjoyable and accident-free.
Workspace Lighting
Appropriate lighting is vital for crafting intricate paper flowers. Natural daylight is ideal because it provides accurate color perception and reduces eye strain.
Position the worktable near a window when possible, but supplement with adjustable LED lamps on cloudy days or evenings. Choose bright, even lighting that eliminates harsh shadows on the work surface.
Clip-on lamps or desk lights with adjustable necks allow the user to direct illumination exactly where it’s needed. Avoid yellow-tinted or dim bulbs, which can make detailed work difficult.
For lengthy crafting sessions, consider anti-glare bulbs or daylight-balanced options to maintain comfort. Checking the finished flowers under different types of light can also help ensure colors look consistent in various parts of the home.
A well-lit space makes every step, from cutting to assembling, easier to manage and error-free.