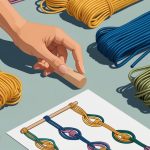

How to Cross Stitch
Cross stitch is a popular method for filling areas with color and creating decorative patterns. The stitch is formed with two diagonal lines crossing to make an “X” shape, most often worked on even-weave fabric or aida cloth.
Patterns are usually charted with a grid, making it beginner-friendly. To create a cross stitch:
- Bring the needle up at the lower left corner of a square.
- Insert the needle down at the upper right corner.
- Bring it up at the lower right corner, then down at the upper left.
- Repeat this process to build rows or fill an area.
Consistent thread tension is important for an even appearance. Beginners can use embroidery floss and blunt tapestry needles, which help prevent snagging.
For step-by-step instructions and visual examples, check the Step-By-Step Tips And Tricks To Mastering The Art of Embroidery.
Mastering the Chain Stitch
The chain stitch creates interlocking loops that resemble the links of a chain, adding both texture and decorative flair. This stitch is versatile and used for outlining, lettering, and creating borders on embroidery projects.
To form a chain stitch:
- Bring the needle up through the fabric, then down at the same spot, leaving a loop.
- Bring the needle up a short distance away, catching the loop with the needle.
- Pull the thread gently to form the chain.
- Repeat to create a continuous line of interlocked loops.
Control the size and shape of each loop by adjusting needle distance and thread tension. Embroiderers often use this stitch for visible flair in folk art and contemporary embroidery designs.
For a visual guide and more techniques, refer to the Basic Embroidery Stitches for Beginners tutorial.
Experimenting with different floss colors and fabric choices helps beginners develop their own unique embroidery style.
Decorative Embroidery Techniques
There are several essential decorative embroidery techniques that help beginners achieve polished, textured, and visually appealing results. Mastering a few fundamental stitches provides a strong foundation for a wide variety of creative projects.
Satin Stitch for Smooth Fills
The satin stitch is prized for its sleek, glossy surface, perfect for filling shapes and creating blocks of solid color. This embroidery technique involves making closely spaced stitches across a defined area, keeping each stitch parallel and evenly tensioned.
Key tips for achieving a smooth fill include:
- Outlining the shape with a split or back stitch before filling.
- Starting from the center of the shape and working outward.
- Keeping stitch length consistent for a uniform finish.
This stitch is commonly used for petals, leaves, and lettering. Practicing on simple shapes can help improve control over stitch placement and thread tension.
For more guidance, see this step-by-step guide to satin stitch and other techniques.
Adding Texture with French Knots
French knots add dimension and tactile interest to embroidery work. This texture-rich technique is used for creating detailed accents like flower centers, eyes, and decorative speckles.
To make a French knot:
- Bring the needle up through the fabric.
- Wrap the thread around the needle one or two times.
- Reinsert the needle close to the original entry point, while holding the thread taut.
Varying the number of wraps and thread thickness can make knots larger or smaller. Beginners may find it helpful to practice on scrap fabric before incorporating French knots into a design.
Mastering this stitch enables intricate, textured embellishments without bulky buildup. For more instruction, check out this comprehensive embroidery tutorial.
Long and Short Stitch Effects
Long and short stitch, also known as the painting stitch, allows for subtle color gradients and shading in embroidery. This technique involves alternating long and short stitches to seamlessly blend colors, making it ideal for realistic floral petals, feathers, or fur.
Stitching typically starts at the base of a section, alternating between longer and shorter lengths to break up edges and avoid visible rows. Changing thread colors gradually lets the shades transition smoothly.
This technique requires patience and careful planning, especially when working with thread color changes. Stitchers often outline the section, then fill it row by row, blending colors and lengths as they go.
Using a hoop can help keep the fabric taut and stitches even throughout the process. For additional tips and visuals, see step-by-step embroidery instructions.
Creative Stitches for Unique Designs

Embroidery enthusiasts can add visual interest and creative flair to projects by mastering versatile stitches. Techniques like the stem stitch, split stitch, and detached chain stitch offer precise control, texture, and endless possibilities for customization.
Stem Stitch for Outlines
The stem stitch excels at creating smooth, even outlines that follow curves and bends with ease. By working short diagonal stitches that slightly overlap, embroiderers can trace detailed shapes or lettering with a clean, rope-like effect.
This technique is especially effective for botanical stems, borders, and script text. Key tips for a neat stem stitch include maintaining even tension and stitching along the design’s contour.
Using an embroidery hoop keeps the fabric taut and prevents puckering. Experimenting with thread thickness or color blending offers additional ways to personalize the outlines, and creative placement can make designs stand out, drawing the viewer’s eye along graceful lines.