
Embroidery is a timeless art that transforms ordinary fabric into stunning pieces of creative expression. Anyone can master the art of embroidery with the right step-by-step guidance, even if they are total beginners.
By learning the basic stitches, collecting essential materials, and understanding different techniques, anyone can quickly turn a blank canvas into a vibrant work of art.
Beginners often feel overwhelmed by all the stitches and tools, but clear instructions and practical tips can make embroidery accessible and enjoyable. Resources like this detailed step-by-step guide for beginners offer easy-to-follow projects, help with choosing needles and threads, and advice for practicing foundational methods.
Essential Embroidery Materials
Getting started in hand embroidery requires selecting the right foundational materials. Understanding key differences in available fabrics, threads, needles, and hoops helps every beginner set up with confidence and ensures an easier and more enjoyable stitching experience.
Choosing the Right Fabric
For most beginners in embroidery, fabric choice can impact visibility of stitches, ease of handling, and overall project results. Natural fibers like cotton or linen are favored for their smooth weave and durability.
Cotton muslin, quilting cotton, and linen blends offer even weaves that simplify beginner needlework. When choosing fabric, consider the weave’s tightness.
A fabric that is too loose may fray or be challenging to control. Avoid stretchy materials for early projects, as the distortion can make even stitches difficult.
Pre-washing and ironing fabric before use helps prevent shrinking and puckering. Beginners also benefit from starting with lighter-colored fabric, as it allows designs and transfer lines to remain clearly visible.
Avoid heavily patterned or dark materials until more advanced. Many embroidery guides recommend using fabrics specifically designed for needlework, such as Aida cloth or evenweave, especially for counted thread techniques like cross-stitch.
Selecting Needles for Embroidery
Choosing the correct embroidery needle ensures smoother, more precise stitching. Embroidery needles (also called crewel needles) have a long eye, which makes it easy to thread embroidery floss and minimizes tangling or shredding of threads.
Sizes range from 1 to 10, with lower numbers indicating thicker needles. For most cotton embroidery floss, a size 7 or 8 embroidery needle is ideal for beginners, balancing control and ease of threading.
Sharper needles are best for closely woven or tough fabrics, while ballpoint needles are used for knits or stretch fabrics to avoid snags. Some projects—particularly those involving beading or specialty threads—may require specialized needle types.
Keeping a small variety of needles handy in different sizes allows a beginner to adapt to different threads and fabric weights. Packaging is often labeled for compatibility, making selection easier, and needle organizers can help prevent loss or confusion during projects.
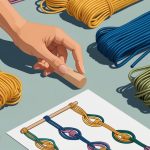
Picking Embroidery Threads
Embroidery thread selection affects both the appearance and durability of finished work. The most common hand embroidery threads include:
- Cotton embroidery floss: Six separate strands twisted together; can be split for more delicate or bolder work.
- Pearl cotton: Tightly twisted, comes in different weights, and offers a glossy, rope-like finish.
- Silk, wool, and rayon threads: Sometimes used for specialty effects.
DMC and Anchor are two prominent brands offering consistent colorfast shades, a detail especially important for projects that may be washed. Beginners often start with cotton embroidery floss, as it is widely available, versatile, and easy to work with.
For more about thread basics, see this helpful guide outlining tool and material options. Thread color is also important; beginners should choose shades that contrast well with their chosen fabric to easily see stitches.
Keeping skeins organized, either with bobbins or bags, helps maintain neatness and prevents tangling.
Must-Have Hoops and Frames
Embroidery hoops and frames are critical for maintaining consistent stitch tension, preventing puckering, and making the overall hand embroidery process more comfortable. Hoops come in various materials, such as wood, plastic, and spring-tension models.
A standard wooden hoop with a metal screw is widely recommended for beginners and works well for most projects. They typically range from 4 to 10 inches in diameter.
Select a hoop just slightly larger than your design to prevent stretching or distorting the fabric. For large needlework projects, rectangular or scroll frames can provide support for a wider area.
To use, the fabric should be taut in the hoop but not overstretched. An improperly tensioned hoop can lead to uneven stitches and distorted fabric.
Some stitchers wrap the inner ring of the hoop with twill tape for extra grip and to protect delicate materials. Having a few different size hoops on hand adds flexibility for different project scales and fabric types.
For specific product recommendations and usage tips on hoops, watch this step-by-step supply overview.
Understanding Basic Embroidery Stitches
Building fundamental embroidery skills starts with learning the most essential hand stitches. Beginners benefit from understanding how each stitch functions, the materials required, and techniques for maintaining consistent tension and neat results.
Running Stitch Essentials
The running stitch is the simplest of all embroidery stitches. It involves passing the needle up and down through the fabric at regular intervals, making a dashed line pattern.
This stitch is ideal for outlining shapes and adding texture to embroidery projects. Beginners should focus on keeping the stitch lengths consistent to create a neat appearance.
Use a sharp embroidery needle and stranded cotton floss, separating the strands as needed. A hoop can help keep the fabric taut and prevent puckering.
The running stitch also forms the foundation for more advanced stitches and techniques. Here’s how to do a basic running stitch:
- Bring the needle up through the fabric.
- Move the needle forward a short distance and insert it back down.
- Repeat, keeping stitches and gaps roughly equal.
- For best results, keep the fabric in a hoop for even tension.
For a comprehensive tutorial, visit the Embroidery 101: How to Embroider guide.