

Adding Texture with Clove Hitch Knots
The clove hitch knot, sometimes called a double half hitch, adds texture, depth, and movement to macrame wall hangings. This knot is primarily used to create diagonal lines, arches, and curves, offering a contrast to the strict horizontality of square knot rows.
Creating texture involves wrapping a working cord around a holding cord repeatedly, forming lines that can curve or zigzag. Designs such as chevrons, diamonds, and waves are common.
The technique works well for outlining sections or separating different design panels within a larger wall hanging. As a design grows, combining clove hitch knots with other basic knots produces layering and tactile variety.
This method is suitable for both modern and bohemian patterns, and step-by-step visuals can be found in tutorials like this macrame wall hanging guide using beginner knots. Careful tension and placement are key to clean, attractive textured effects.
Incorporating Wooden Beads and Accessories
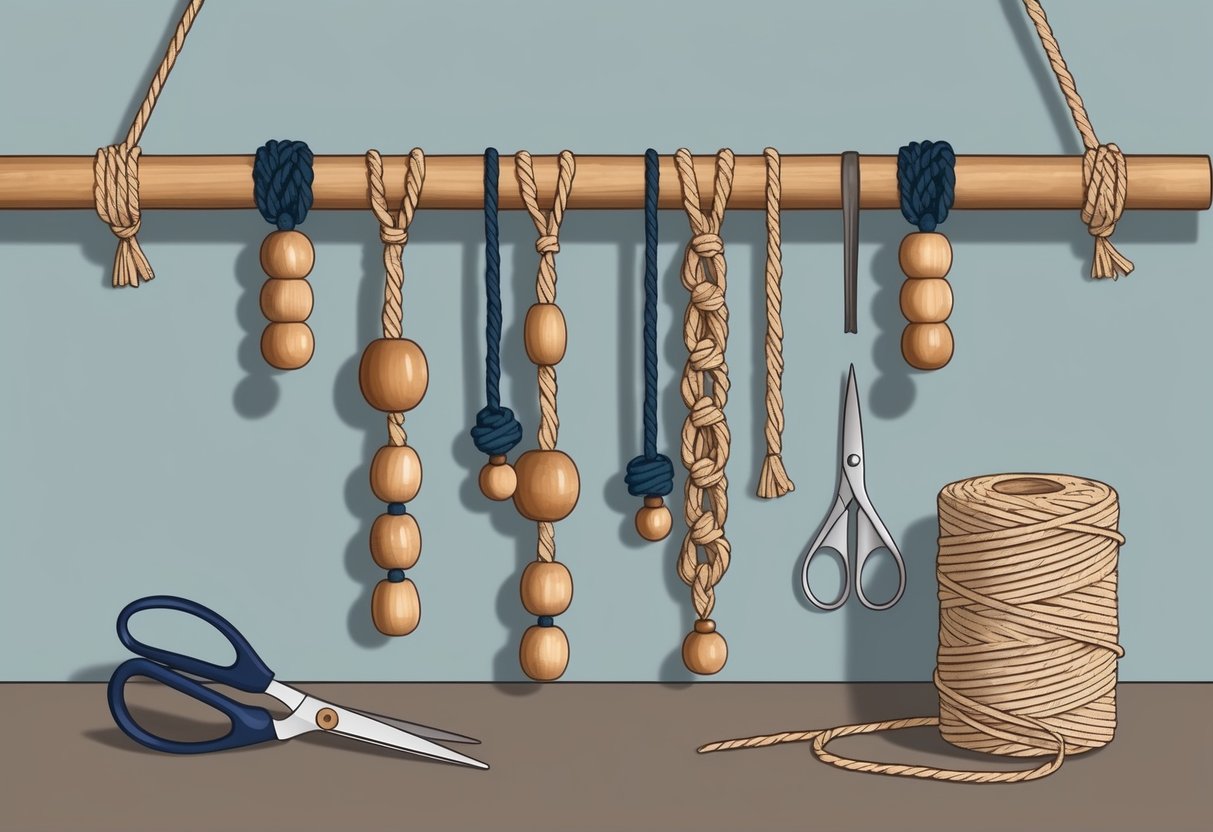
Adding wooden beads and accessories can enhance the texture, color contrast, and visual interest of any macrame wall hanging project. Selecting quality decorative elements and ensuring that beads stay securely attached during display are both essential steps for a polished, long-lasting result.
Choosing Decorative Elements
Wooden beads come in a variety of sizes, shapes, and finishes. When choosing beads for a macrame wall hanging, consider the thickness of your cotton or jute cord.
The hole in the bead must be large enough for the cord to pass through smoothly without damaging the fibers. Smooth, unfinished wooden beads are popular since they are lightweight and easy to dye or paint if custom colors are needed.
Select beads that complement the overall color scheme and style of your project. Natural wood tones work well with neutral cords, while painted or stained beads can add pops of color and personality.
Consider combining wooden beads with other decorative elements like metal rings or shells for added depth and texture. Larger beads make a bold focal point, whereas smaller beads create subtle detailing.
For inspiration and examples of integrating beads in macrame wall art, see tutorials such as this mini macrame wall hanging with beads.
Securing Beads Firmly
Proper attachment of wooden beads keeps them in place and prevents them from sliding or falling off over time. To secure a bead, thread the cord through the center, then use a knot—like a double overhand or square knot—immediately below the bead to lock it in position.
Spacing the beads evenly is important for a balanced appearance. When using multiple strands, try threading each cord end through a bead separately to ensure uniform placement.
For heavier or larger beads, double check the strength of both cord and knot. Tighten knots firmly and trim excess ends neatly.
Following expert tips from macrame demonstrations, such as those in this macrame wall hanging with beads tutorial, can further help beginners master secure bead placement and design variations.
Finishing and Hanging Your Macrame Wall Art
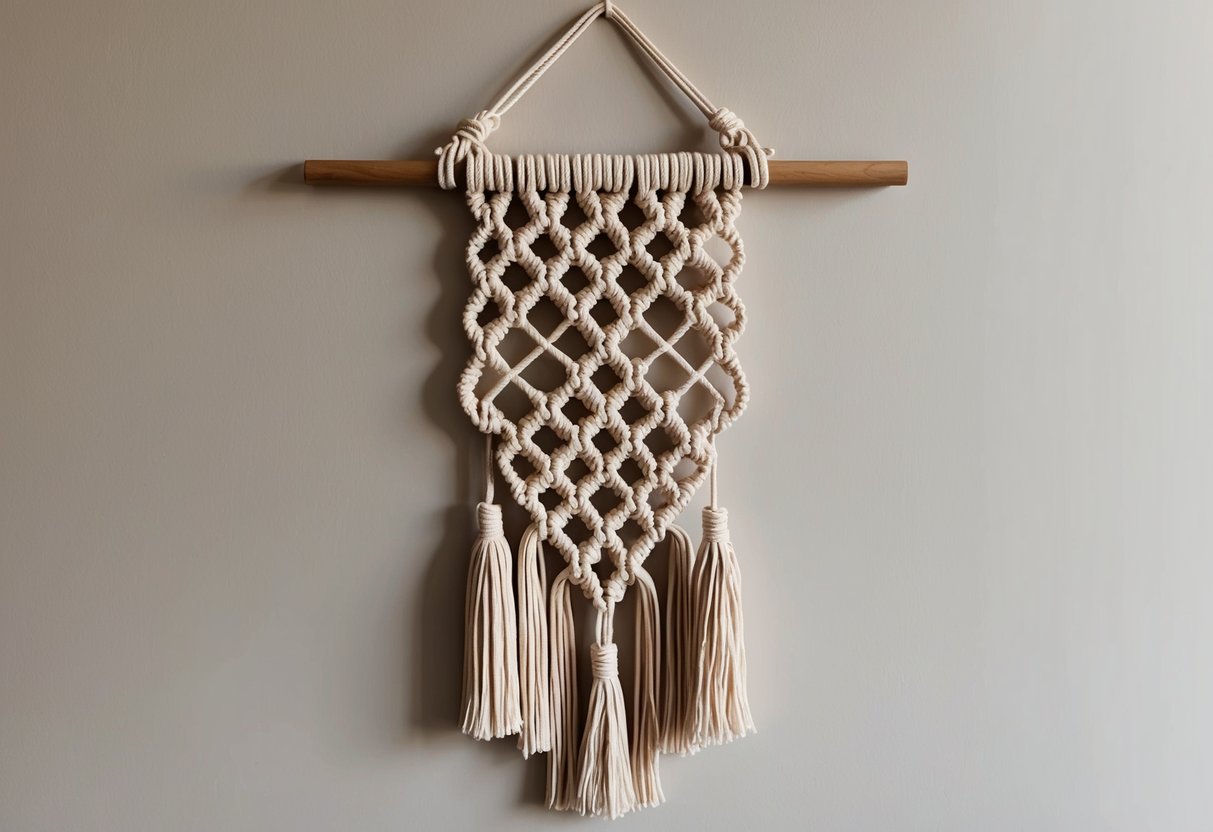
Proper finishing will give the macrame wall hanging a clean, professional appearance. Accurate trimming and secure, well-placed hanging create a polished final result that complements any space.
Trimming Cords Evenly
Trimming the cords of a wall hanging is a crucial final step. Using sharp fabric scissors, the crafter should carefully align the cords to ensure a straight or desired angled edge.
Precision matters; measuring from the dowel to each cord’s end can help maintain symmetry and produce a uniform look. To avoid mistakes, it is helpful to use a ruler or masking tape as a visual guide along the bottom edge.
Cut slowly and in small increments, as trimming too much cannot be undone. For those preferring a layered or chevron finish, mark each point with a washable fabric pen before making any cuts.
Blunt or uneven tips can make the macrame suspension appear unkempt. Gently comb frayed ends for a neat finish.
If small fibers stick out, snipping them with detail scissors will create crisp lines.
Tips for Hanging Macramé Suspension
Choosing the right spot and hardware is important for displaying a macrame wall hanging securely. Use a sturdy wooden dowel, copper pipe, or decorative branch for hanging, and make sure both the wall and mounting points can support the weight of the piece.
Install a hook, nail, or screw at the desired spot, considering both height and balance. For larger wall hangings, two anchor points are recommended to prevent tilting.
Ensure the suspension cord or string is tied evenly to avoid slanting. Check that the wall hanging drapes flat and does not bunch at the top.
For a lightweight wall art display, removable adhesive hooks can be used, but for long-term installation, traditional wall anchors work best. Adjust positioning as needed to achieve a symmetrical, eye-pleasing display, as detailed in many easy macrame wall hanging tutorials.