

Preparation and Safety Tips
Success in resin crafting relies on following best practices for setup, accurate measurements, and handling the curing process. Staying safe and organized helps ensure brilliant results and minimizes common issues like uneven curing and trapped bubbles.
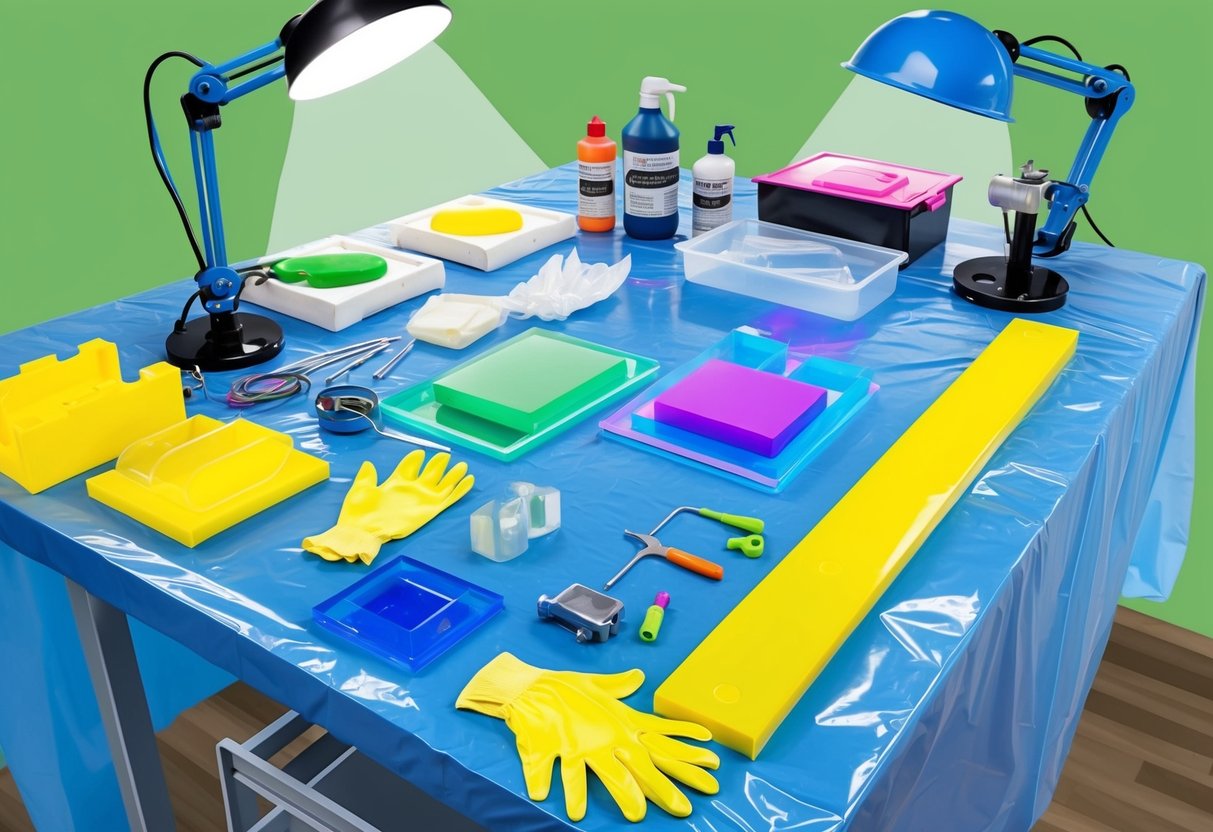
Setting Up Your Workspace with Natural Light
A well-lit, clean workplace is essential. Choosing a space with ample natural light allows for better visibility when measuring and pouring resin.
Good lighting also helps identify dust, debris, or unwanted particles before they become embedded in the surface. Ventilation is critical as most epoxy resins give off fumes during mixing and curing.
Open windows or use a fan to keep air circulating. Always protect skin and eyes by wearing gloves and, if recommended by the manufacturer’s instructions, safety goggles.
Some resin brands also suggest a respirator for added protection. For further details on personal safety, see these safety best practices.
Cover work surfaces with plastic sheeting or disposable tablecloths to make cleanup easier. Keep tools and materials within easy reach.
This setup helps reduce interruptions and potential contaminations during pouring or designing your piece.
Mixing and Measuring Tips
Using accurate measurements is essential: most resins require equal parts of resin and hardener. Carefully read the manufacturer’s instructions and measure components using graduated cups.
Mixing too much or too little can result in sticky or improperly cured art. Stir slowly and scrape the sides and bottom of your mixing container to blend thoroughly.
Quick, careless mixing may trap extra air or leave portions unmixed, leading to tacky spots after curing. Allow mixed resin to rest briefly, letting bubbles rise.
If you are adding pigments, glitters, or other inclusions, mix these in after the base resin and hardener are fully blended. This helps ensure consistent coloring and smoothness across the final artwork.
For a clear walkthrough, see these resin mixing fundamentals.
Handling Air Bubbles and Curing Time
Air bubbles are a common issue in resin art and can affect the final appearance. For best results, use a heat gun or small torch shortly after pouring to gently sweep across the surface.
This causes bubbles to rise and pop, leaving a glass-like finish. Keep the environment free of dust and sudden temperature changes.
Cover the curing art with a protective lid or a box to avoid debris settling on the wet surface. Allow enough curing time, as recommended by the resin manufacturer, and avoid touching or moving the project during this period.
Typical curing times range from 24 to 72 hours depending on the brand and thickness of the pour. Incomplete curing can leave tacky or cloudy areas.
Be patient and check that the piece is fully set before handling or displaying your finished resin creation. More practical tips can be found in this resin art guide.
Beginner-Friendly Resin Art Techniques
Basic techniques allow beginners to achieve beautiful resin art results with simple tools. Hands-on approaches like layering and blending colors are easy to master and help new artists create visually appealing pieces early on.
Layering and Pouring Basics
Layering and resin pour techniques form the backbone of many beginner resin projects. For a clean outcome, prepare a flat, dust-free work area and always use a level surface.
Most beginner resin artists start with clear or tinted resin, mixing equal parts of resin and hardener as indicated by product instructions. Use silicone cups or bottles for easy pouring.
Pour the resin slowly in layers rather than all at once. This prevents air bubbles and gives control over the design.
Let the first layer partially cure before adding a second to create depth and sharp lines between layers. For best results, cover the project with a dust cover during curing.
Always wear gloves and protect surfaces to avoid spills.
Simple Color Blends and Swirls
Color blending allows unique effects in both simple coasters and larger beginner resin projects. Add epoxy-safe pigment, acrylic paint, or mica powders to the resin in separate cups.
Pour tinted resin in sections, then use a stick or heat tool for gentle blending or swirling. To achieve marbled or wave patterns, pour colors side by side and drag a skewer or toothpick through the resin in gentle, controlled shapes.
Avoid over-mixing, as this can muddy the colors. Experiment with metallics, transparent tints, or subtle gradients to add dimension.
Beginners may try basic color combinations before moving on to more complex designs. For more step-by-step tips and beginner-friendly examples, visit this beginner’s guide to resin art.
Creative Ideas for Unique Home Decor
Creating handmade resin art can transform living spaces with personalized style and vibrant color. DIY resin projects like coasters and coffee tables offer both function and aesthetic value, making them highly popular choices for home decor enthusiasts.
DIY Resin Coasters
Resin coasters are one of the most accessible resin art projects, perfect for introducing unique designs to any home. They serve as both decorative accents and practical items that protect surfaces.
Users can embed materials such as glitter, pressed flowers, or colored pigments for a custom touch. Popular techniques include:
- Layering different resin colors for a marbled effect
- Using silicone molds for consistent, easy shapes
- Adding small objects or text for personal mementos
Preparing a clean workspace and using the proper safety gear—like gloves and a mask—is essential, as uncured resin can be toxic. After curing, sanding the coaster’s edges smooths the finish.
For more beginner project inspiration, see these easy epoxy resin ideas that demonstrate technique variety and design options.
Epoxy Coffee Table Projects
Resin coffee tables have become a statement piece in modern home decor. This project lets creators combine natural wood, pigments, and epoxy to produce visually striking results.
River tables, which feature a vivid resin channel between live-edge wood pieces, are especially popular. Key steps include:
- Designing and building a stable mold for the tabletop
- Mixing and pouring resin—sometimes in multiple layers—for depth
- Embedding decorative items such as stones or shells for extra impact
After pouring, tables require a thorough curing period followed by sanding and polishing for a glossy finish.