

Using a Cutting Machine Effectively
My first Cricut project? Total wreck. The blade just mauled the cardstock because I didn’t swap mats. Nobody tells you a fresh mat actually matters, or that blade settings aren’t just for show. All those YouTube tutorials? They skip the part where a good machine like Silhouette or Cricut is only as good as your mat’s stickiness, blade sharpness, and whatever firmware update just broke everything. It’s not “plug and play” unless you’re into jagged edges.
Vinyl transfer? Sticky mess. After six months, everything warps, blades get dull, nothing lines up, and suddenly you’re wasting expensive iron-on. The help forums? Everyone’s just yelling “clean your mat, check your blade!” and I wish I’d listened before I wasted a whole sheet for a birthday shirt. I even sliced through my own cutting mat once because I trusted Cricut’s “poster board” setting. “Auto-blade technology” is a joke—manual tests are the only thing that works. One tiny mistake and you’re out ten bucks in supplies.
Maintaining Your Tools for Longevity
I killed a set of pliers by washing them—rust city overnight. People act like craft tools are immortal. Snip one wire with your fabric scissors and you’re done. Cordless drills need dusting, and for the love of all that’s sharp, keep your blades dry.
Nobody oils their hinge tools—maybe because the bottles are tiny and vanish instantly. Sharpening rotary blades? No magic trick, just cut some scrap and if it skips, toss it. I know someone who buys mats in pairs—one for fabric, one for paper—because they dull differently. That’s not overkill, that’s just smart.
Lose a needle and you’re sunk. I label every bin, which looks unhinged until I need a craft knife at 1 a.m. White marks on a self-healing mat? That thing’s toast. Maintenance is boring, but after ruining a $40 mat, I’m religious about it.
Common Mistakes in Adhesion and Surface Prep
Everything’s supposed to stick, but it never does. I’ll sand for ages, then the paint peels, or tape yanks off half the finish. Even the pros admit most failures are from skipping steps or just being impatient.
Peeling and Cracking Issues
Everyone’s got a magic sealer that’ll “never peel”—except, yeah, it still does. One pro told me three-quarters of paint fails because people don’t prep, not because the paint sucks. I’ve watched my own projects flake the day after drying and still thought “maybe it’s the product.” Nope. It’s always grime, grease, or dust you missed.
My neighbor repainted her baseboards three weekends in a row because she skipped degreasing. Paint adhesion is all about what you don’t see—old glue, cooking oil, dust. People layer over bad bases and get cracks, chips, or weird bubbles. Then they drag out a hairdryer or caulk gun, thinking it’ll fix it. None of it works unless you strip, scrape, and clean—sometimes with ammonia (gross). If you skip it, you’ll spend double the time later.
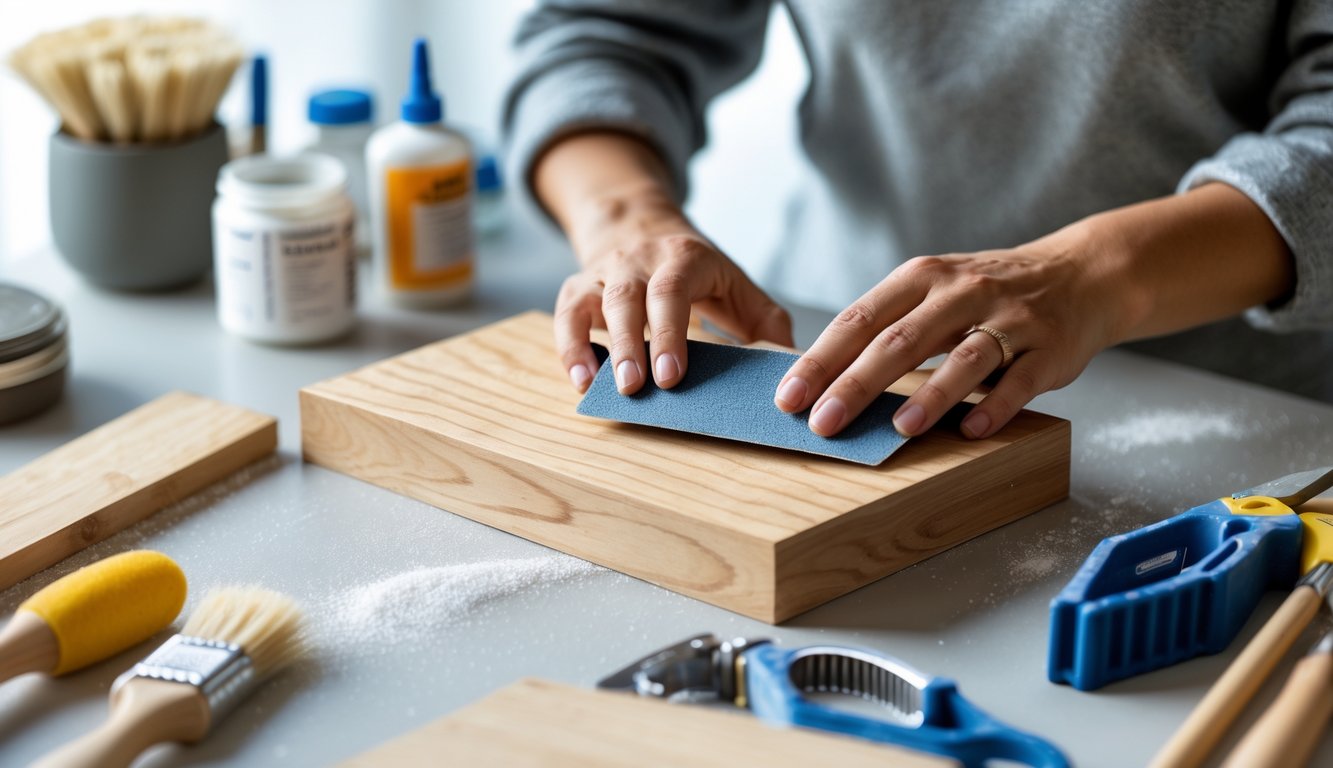
Avoiding Skipping Sanding
No one wants to sand. Everyone acts like primer is a magic fix, but it’s not. First time with chalk paint, everything looked good until I touched it—fingerprints everywhere. Didn’t rough up the surface, so it peeled. My cabinets peeled like a bad sunburn because I got lazy.
A painter told me, “If it’s shiny, it’s not ready.” That’s it. Glossy = no bond. Most people use the wrong grit—too rough, it looks like concrete; too fine, it’s useless. I switched to 120-150 grit and suddenly paint actually stuck. Sanding sponges? Sometimes you just need a sander, especially for big stuff. The time it saves is worth it.
Dust is evil. If you don’t wipe with a tack cloth, expect touch-ups forever. Skipping sanding is the shortcut from hell—I learned that after my bookshelf cracked in two days.
Ensuring Proper Adhesion Techniques
Painter’s tape—everyone messes it up. I’ll press with a card, swear it’s stuck, and still get leaks because I didn’t press hard enough or missed a greasy spot. Tutorials skip this, but pros talk about “mechanical bonding”—you need grit and a clean, dry surface or nothing sticks.
Tried using a space heater to speed up drying—big mistake. Tape curled, paint got rubbery, stuck to itself. The best advice I’ve heard: slow down, use good materials (not expired caulk), let primer actually cure, and always pull tape while the paint’s tacky. Not after it dries. Makes no sense, but it works.
Cutting corners always backfires. Painting over dust or using bargain glue just makes more work. That’s why there’s a whole list of avoidable painting mistakes. The “common” ones never stop being annoying until you finally fix your habits.
Safety First: Precautions Crafters Often Overlook
Nothing ruins a Saturday like realizing you forgot safety stuff and now you’re hunting for goggles that aren’t caked in paint. It’s always the little things—no gloves, wrong blade, whatever. Even the die-hards mess it up.
Essential Protective Equipment
Still blows my mind how many crafters ditch gloves, goggles, and masks. Like, am I the only one who’s gotten glue burns or inhaled glitter? There’s a stat somewhere (I think Home as We Make It mentioned it): injuries spike as soon as someone skips eye protection. Next thing you know, you’re explaining sawdust in your contacts to the ER nurse. Who’s ever ready for that?
I’ve seen people rush to finish a project, no mask, sanding MDF—don’t do that. And the glove thing? People reuse gloves with holes, thinking it’s fine for paint or super glue. Spoiler: it’s not. I once skipped double-gloving for resin and regretted it instantly. Should’ve listened to Trinity Creative Tutorials, who always say have face masks and gloves ready—don’t trust your memory or logic when you’re in the middle of a mess (Trinity Creative Tutorials: Safety Tips for Crafting). No one needs dye-stained hands for a week.